
You will need:
Crayons I picked up 10 boxes for $2 at Target during their back to school sale
Ice cube tray or candy mold
Craft knife
Paper cups One for each color
Cookie sheet
Craft stick or skewer to stir the melted crayons
Parchment paper (optional)
Foil
Oven
Preheat your oven to a low setting, 225 to 250
Line your cookie sheet with parchment paper if you want. This is just to protect it from spills.

I found they peel much easier if you use a craft knife to slit the wrapper down the side.


Place the cups on the cookie sheet and put the cookie sheet in the oven.
While your crayons are busily melting away, lay a piece of foil on the counter and place your trays or molds on it. The foil should be large enough to protect your counter from spills. You want your molds to be as level as possible. (Pretend that I used foil, which I didn't and my spills soaked through and I had to scrub my countertop to remove the colored wax. Yuck.)


Pour your melted crayons into the design of your choice. Fill the design to the top. As the crayons cool and harden again you will get an indentation in the middle. Reserve some of the melted crayons to fill in any dips in the center. I leave my oven on, with the cookie sheet and cups in it while the molded crayons cool. Then it's easy to fill in the dips as they form.

Let the crayons cool completely and then just pop them out of the molds.

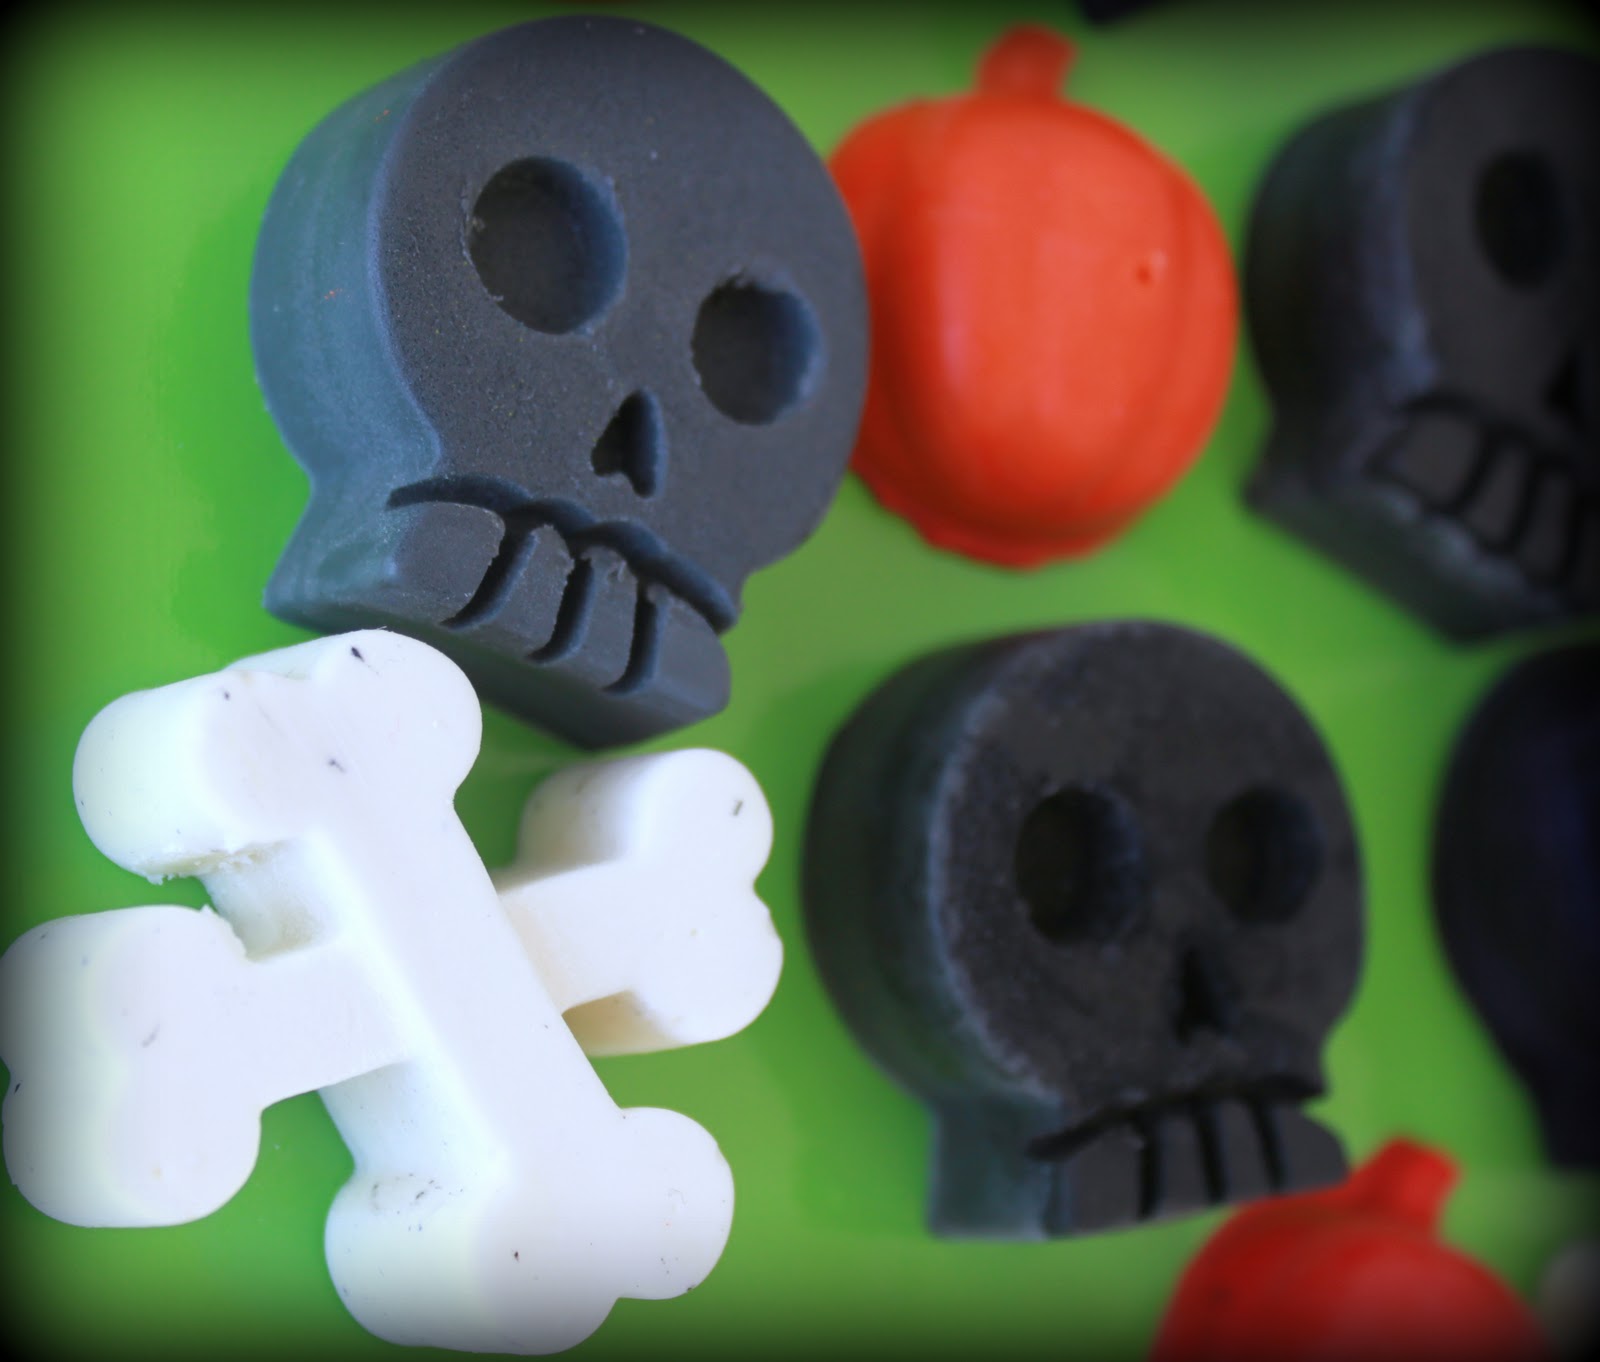
My pumpkin mold was not very deep so it only took about 2 crayons to fill each section. The skeleton and bones were 3/4" deep and it took about 5 crayons to fill each section. I love the detail of the skeletons! They have great teeth and eyes.
Now color! Coloring is so relaxing and fun. By the way, the awesome coloring page is from Faces Faces Everywhere by Yukiko Kido. And yes, I bought it for myself. Because I'm a grown up and I can.

Hope you enjoyed the tutorial! If you try it out, please let me know how it goes for you. Comments are always welcome.
Thanks!
Hopefully (crossing my fingers) I will be linking to Think Pink Sundays at Flamingo Toes. Since this is all new to me and I am technically challenged, we'll see what I can do.
No comments:
Post a Comment